Before we get started, and for those of you who don't know what Vue.js is, here is a short description from the project website.
Vue (pronounced /vjuː/, like view) is a progressive framework for building user interfaces. Unlike other monolithic frameworks, Vue is designed from the ground up to be incrementally adoptable. The core library is focused on the view layer only, and is very easy to pick up and integrate with other libraries or existing projects.
This post will look at one possible way to integrate Vue.js into an Oracle JET-based application. NB: I cannot claim this is the only or best way and I reserve the right to revisit (and revise) this as I gain more experience with JET and Vue.js. Until then, read on!
Update: Geertjan Wielenga, Product Manager at Oracle has provided this nice introduction on integrating Vue with Oracle JET. Please include this video in your research on the subject. It was very helpful to me in validating my own approach. https://www.youtube.com/watch?v=BMs9KoSGi7s.
Step 1: Get the Oracle JET CLI
If you have not worked with JET then your first task will be to get Oracle JET and the CLI setup so you can create new applications. I am also assuming you have some experience with Node.js and Node Package Manager (npm) so I will not be diving deep into describing those tools here. You have primarily two options available for deploying Oracle JET applications npm-style. If you already have the Node.js and Oracle JET command-line tools setup you can skip ahead to the next section.
- The first approach uses Yeoman. This was the original template and toolchain released by the Oracle JET team for creating JET applications. You can read more about installing the required software here: Getting Started with Oracle JET and here: Learn to Build Oracle JET Native Apps with Electron and Node.js
- The Second approach uses a new Oracle JET Command-Line Interface (CLI) and it is the approach I will be using in this tutorial. You can learn more about installing and using the Oracle JET CLI here: Using the new Oracle JET CLI
Note: I will be using the Oracle JET CLI v3.1.2, Node.js v6.10.2 and NPM v5.0.4 in the rest of this post.
Step 2: Create a JET Application
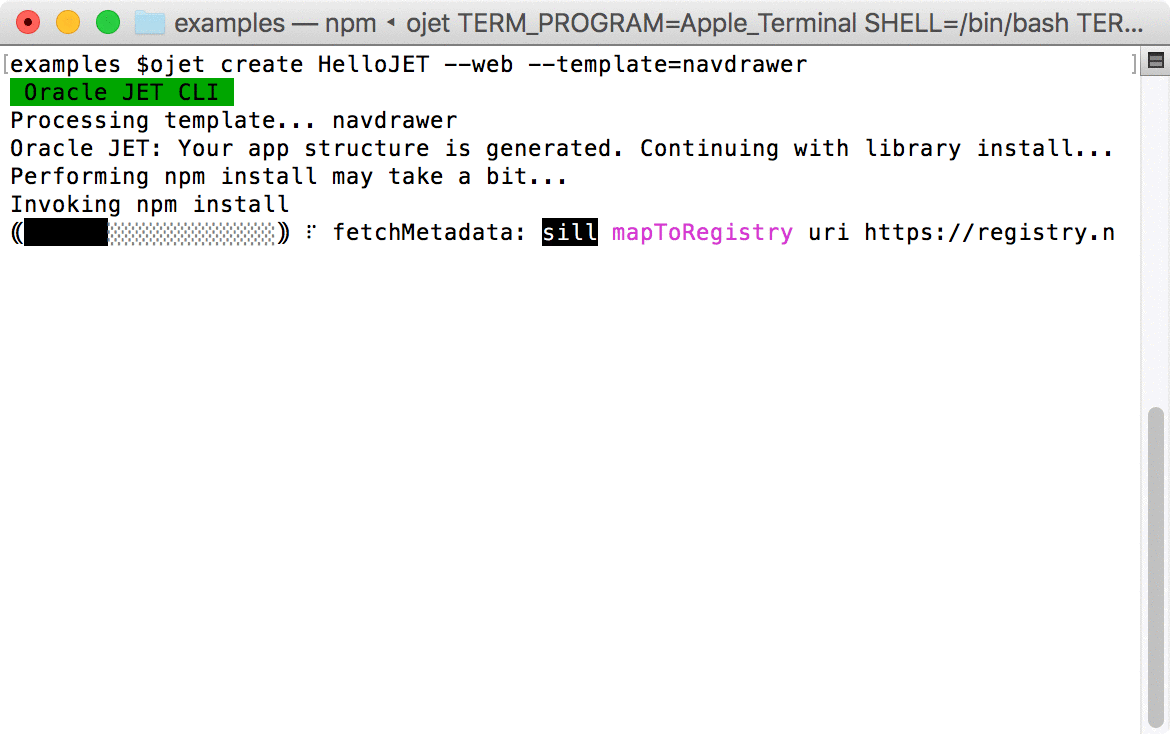
Using the ojet CLI, I will follow the same approach as I outlined in option 2 above to create a new application.
ojet create HelloJET --web --template=navdrawer

After the create finishes change directories into your new application folder. In my example the application directory is called HelloJET.
The next step is to test the application build works as expected after a default template has been installed by the CLI. You can do this by running:
ojet build
Note: if you receive an error after running build such as the following:
Warning: ENOENT: no such file or directory, open 'node_modules/oraclejet/package.json' Use --force to continue.

Aborted due to warnings.
Update: I heard back from the Oracle product management team that NPM 5 has some stability issues and that this is a known issue. They offer two solutions:
- Install
oraclejetseparately (described below), or - Downgrade to npm v4 via
[sudo] npm -g install [email protected]
For option 1 noted above, run additional npm commands to resolve missing dependencies.
npm install oraclejet
Otherwise, if you don't see any errors then you can move on to the next step.
Step 3: Download the Vue.js Library using NPM
After you have created a new JET application and changed directories the next step is to download and include the Vue.js library in your application.
npm install vue --save-dev
Vue.js is tiny and this operation should not take very long to complete. This will download the Vue.js distribution. After running the above command you should see something like the following in your package.json file.
{
  //snippet of package.json showing vue library reference
  ...
  "devDependencies": {
    ...
    "vue": "^2.3.4"
  },
  ...
}
Under node_modules you should now see a new folder called vue/dist/ and within that directory are the various distributions of Vue.js that can be included in a web application. I am only going to worry about vue.js for simplicity. You can read more about the differences of each Vue.js build at the Vue.js website.
Step 4: Adding Vue.js to Oracle JET Build
Now that we have Vue.js installed in our Oracle JET node_modules directory we need to include the vue.js distribution in our actual web application.
- To do this we need to open the grunt build file located at
<your-app>/scripts/grunt/config/oraclejet-build.js. - We need to edit the task called
copyCustomLibsToStagingwhich should be located somewhere around line 36 at the time of this writing.
Before:
// copyCustomLibsToStaging: {
//   fileList: []
// },
After:
copyCustomLibsToStaging: {
  fileList: [{cwd: 'node_modules/vue/dist/', src: ['vue.js'], dest: 'web/js/libs'}]
},
This task instructs Grunt to copy the vue.js JavaScript library into our target Oracle JET web application directory. Note: I've only tested this with the --web build option of ojet. If you are trying another target platform you may need to adjust your process accordingly.
Now re-run a build and then you should find that under <your-app>/web/js/libs/ the vue.js library has been copied in by the grunt task.
ojet build
Step 5: Setup a Simple Vue Application
Now that we have the vue.js JavaScript library included in our web application we can start working with Vue model and bind data to our HTML view. Oracle JET uses Require.js as a core architectural component so we need to get the vue.js JavaScript library included there.
You will need to use your text editor to make updates to various files.
Edit main.js
- Open
<your-app>/src/js/main.jsin a text editor. - Locate the
requirejs.config()block near the top. - In the
paths:{...}section add a new key:value pair forvueas follows:
paths:
  //injector:mainReleasePaths
  {
    'knockout': 'libs/knockout/knockout-3.4.0.debug',
    ...
    'vue': 'libs/vue' // add this line to your paths config.
  }
Edit main-release-paths.json
- Open
<your-app>/src/js/main-release-paths.jsonin a text editor. - Add a new key:value pair for
vueat the end as follows:
{
  "knockout": "libs/knockout/knockout-3.4.0",
  ...
  "vue": "libs/vue" //add vue reference here...
}
Edit dashboard.js (the View Model)
- Open
<your-app>/src/js/viewModels/dashboard.jsin a text editor. - Locate the
define(...)block near the top. - Add a reference to
'vue'and a newVueparameter reference to the callback function as follows:
define(['ojs/ojcore', 'knockout', 'jquery', 'vue'], // add 'vue' dependency here
 function(oj, ko, $, Vue) { // add Vue parameter here

    function DashboardViewModel() {
      var self = this;
...
In this post, I'll be creating a Vue application and model directly within the DashboardViewModel() itself and I'll be leveraging the Oracle JET provided events to load the Vue application. This is necessary to ensure the DOM elements that our Vue application will bind to have already been loaded.
In this example we are going to create a Vue application that will allow items to be added to an HTML select list.
- Locate the
self.handleActivatedblock around row 40 indashboard.js. - Create a new Vue() object, assign the data model and related
addItemfunction as shown below:
Before:
self.handleActivated = function(info) {
  // Implement if needed
};
After:
...
      self.handleAttached = function(info) {
        // Implement if needed
        var app = new Vue({
          el: '#vue-app',
          data: {
            newItem: '',
            items: ['Alpha', 'Beta','Gama']
          },
          methods: {
            addItem: function() {
              if (this.newItem) {
                this.items.push(this.newItem);
                this.newItem = '';
              }
            }
          }
        });
      };
...
For more information on Vue.js and how the library works check out the Vue.js website for a helpful beginner's guide.
Edit dashboard.html (the View)
- Open
<your-app>/src/js/views/dashboard.htmlin a text editor. - Add a new
<div>element with an id ofvue-appas follows:
Before:
<div class="oj-hybrid-padding">
  <h3>Dashboard Content Area</h3>
  <div>
      To change the content of this section, you will make edits to the dashboard.html file located in the /js/views folder.
  </div>
</div>
After:
<div class="oj-hybrid-padding">
  <h3>Dashboard Content Area</h3>
  <div id="vue-app" >
    <form v-on:submit.prevent="addItem">
        New item:
        <input v-model="newItem" @keyup.enter="addItem">
        <input type="submit" value="Add">
        <p>Your items:</p>
        <select multiple width="50">
            <option v-for="item in items">{{item}}</option>
        </select>
    </form>
  </div>
</div>
Step 6: Final Build and Test Vue
With everything above in place, we should finally be ready to build and test our Vue.js binding within our Oracle JET application.
ojet build
After the build is finished serve the application and test the Vue.js application is working as expected.
ojet serve
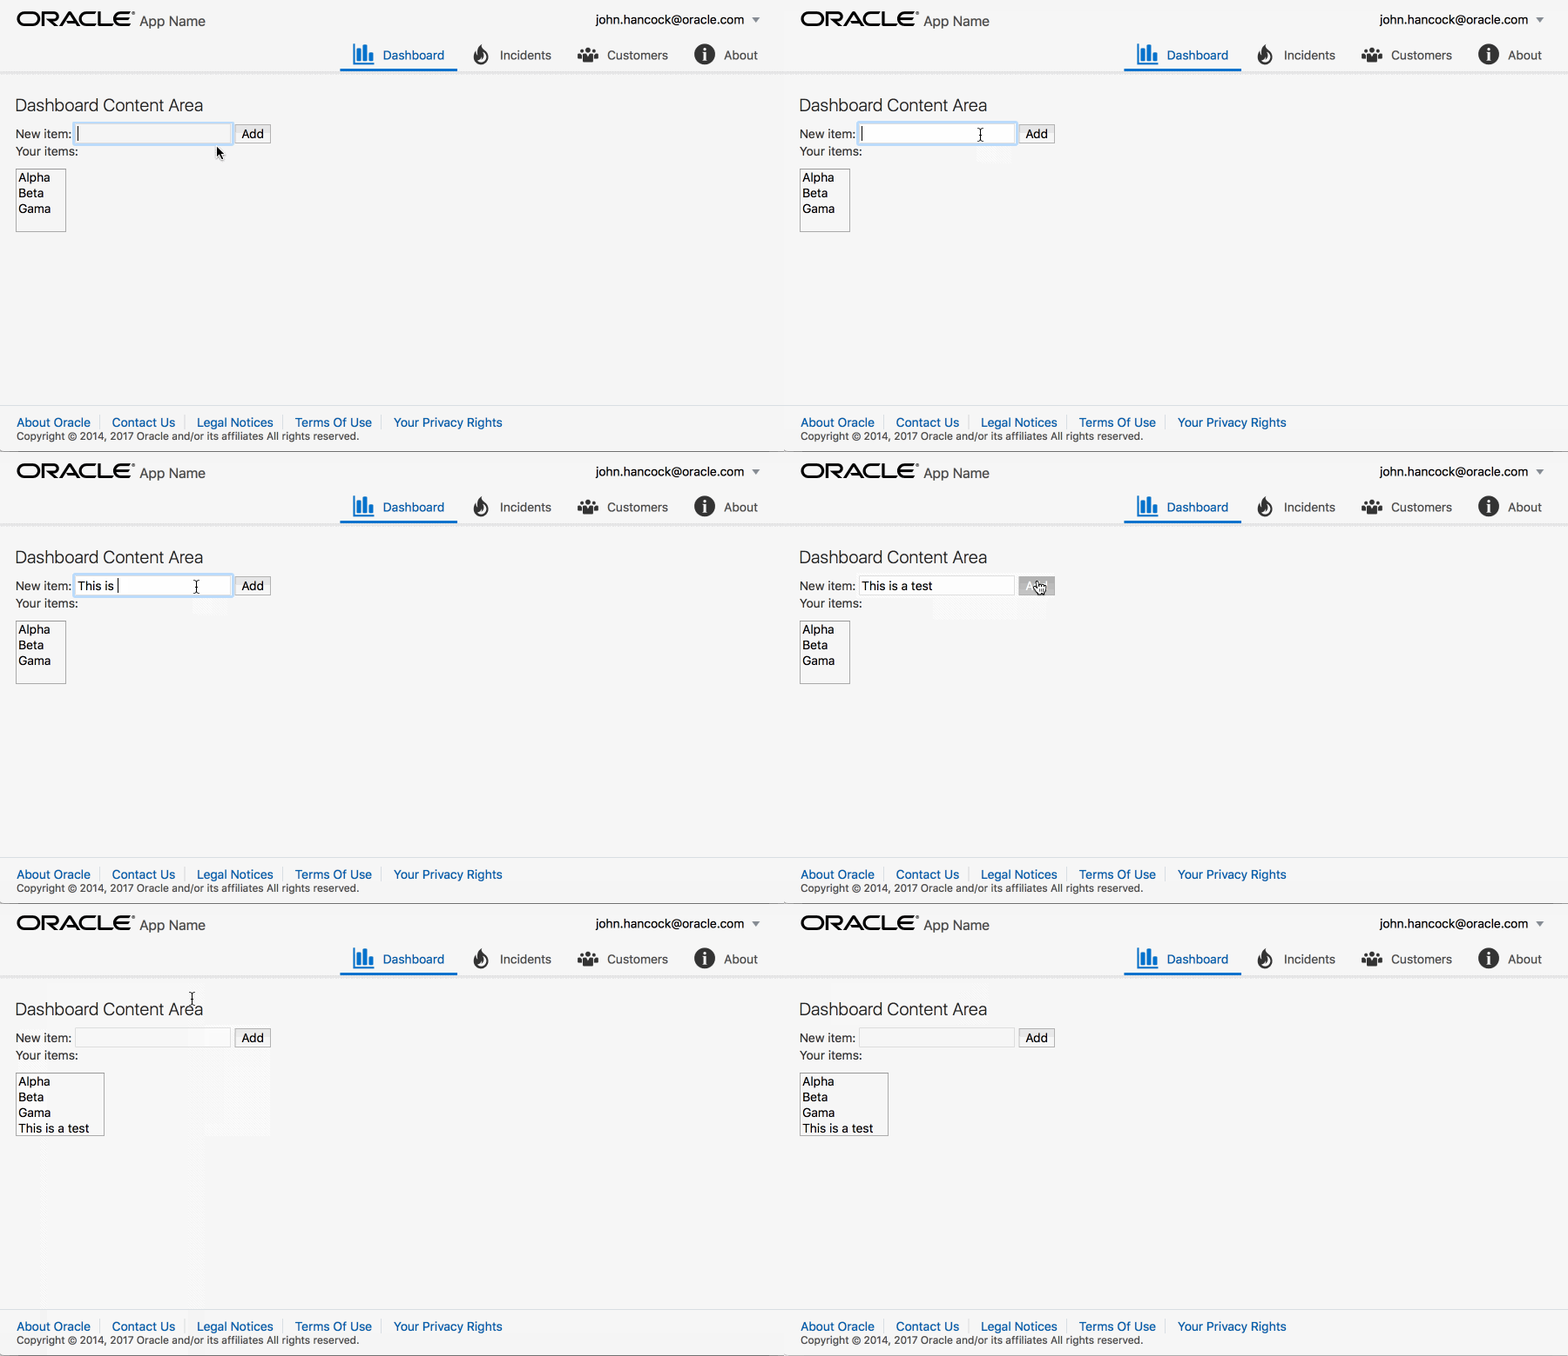
In the browser you should be able to enter new values in the text box and add them to the select box below by pressing the add button. When you press the add button new items are added to the Vue.js data model via two-way binding. Changes to this data model are automatically reflected by the select list box as shown in the screenshot below.

From here you could take any action in your Vue.js application to update or react to changes in the model state, or to interact with other web services.
This is the point where I am supposed to offer you some statistics that support my usage of Vue... Instead I offer this Google Trend comparison and a suggestion.
If Knockout is your thing and you love working with it, keep doing your thing. If Vue.js sounds interesting to you or you have valid use-cases, check it out. Try the Getting Started Guide Update: Geertjan created another video on using Vue with Oracle JET showing how to completely replace Knockout. https://www.youtube.com/watch?v=54CqLy_t7KY Keep in mind:
- This is no small task to complete since a large portion of the current JET templates use KO bindings.
- Oracle is heavily invested right now in the Knockout ecosystem. So using anything instead of Knockout should be weighed against that investment.
Why Oracle JET?
Vue.js is great, so why use it with Oracle JET?
JET isn't focused simply on optimizing the view layer like Vue.js. There are many other enterprise-application enabling features in JET. It also includes a wide range of visualizations and responsive application templates out of the box that you can use to quickly prototype nearly complete applications.
A Comparison of Knockout
Here is a comparison of the two frameworks that bind an array of strings to an HTML form and select list. Our example application above used Vue.js. The code below shows a similar application created in Knockout for reference.
Knockout.js Example JavaScript
var SimpleListModel = function(items) {
    this.items = ko.observableArray(items);
    this.itemToAdd = ko.observable("");
    this.addItem = function() {
        if (this.itemToAdd() != "") {
            this.items.push(this.itemToAdd());
            this.itemToAdd("");
        }
    }.bind(this);
};

ko.applyBindings(new SimpleListModel(["Alpha", "Beta", "Gamma"]));
Knockout JS HTML
<form data-bind="submit: addItem">
    New item:
    <input data-bind='value: itemToAdd, valueUpdate: "afterkeydown"' />
    <button type="submit" data-bind="enable: itemToAdd().length > 0">Add</button>
    <p>Your items:</p>
    <select multiple width="50" data-bind="options: items"> </select>
</form>
There is just enough code to populate a ViewModel and bind it (bi-directionally) to HTML form elements.
Conclusion
To me, it is more obvious and easier to read and understand what is going on in the Vue.js example. The Knockout data-bind attributes require a few more mental pauses. Hopefully this post has given you a solid foundation to get started with integrating Vue.js into your Oracle JET applications. I suspect I will be posting on related topics in the future.
Finally, thank you to Geertjan for producing a related video on incorporating Vue.js. His example provides a more advanced use-case for Vue.js including Vue components which you may find useful. That video can be found on here: https://www.youtube.com/watch?v=BMs9KoSGi7s.
Cheers!